
 About this Article: Hi, I’m Chris – an amateur microscopist. This information is stated as personal opinion for my circumstances and does not constitute advice to you and your circumstances or guarantee quality or fit for purpose of the following products. Use of this website is governed by our Disclaimer, Terms and Conditions and Privacy Policy posted in the footer of this website. As an Amazon associate I earn from qualifying purchases.
There are three ways to take pictures through a microscope:
- Use a Cell Phone (iPhone, Android, etc.)
- Use a USB Microscope Camera
- Use a DSLR Camera with Microscope Adaptor
Of the above three methods, using a DSLR camera is by far the most superior for photomicography, while a Cell Phone is clearly the cheapest – it’s FREE!
When I first got into microscope, I thought I needed a dedicated USB microscope camera. But after doing my research, I realized this was not the best solution. The quality of images and the frame rate of videos is really poor compared to using a DSLR camera.
|
Method |
Price |
Quality |
My Favorite |
Downsides |
Best For |
|
1. Cell Phone |
Free |
Low |
The one in your Pocket! |
Poor images |
Kids’ Projects |
|
2. USB Microscope Camera |
High |
Medium |
Poor video |
People without a DSLR camera |
|
|
3. DSLR to Microscope Adaptor |
Medium |
High |
Heavy |
Videos and high quality photos |
In this article, I’ll outline all three methods and the pros and cons of each.
Method 1: Use a Cell Phone
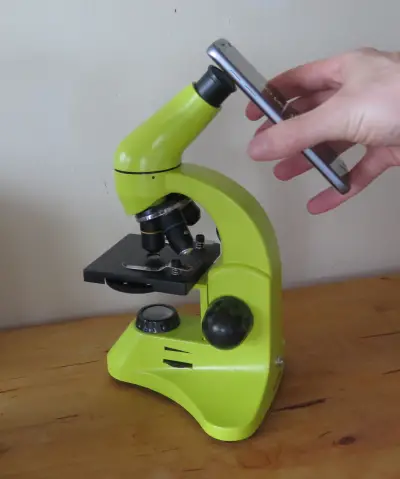
Anyone can take photos of their specimen by simply holding a cell phone’s camera up against the eyepiece. It’s simple, free, and generates passable amateur images.
You can see me doing this method in the below image, with the photo beside it showing the sort of quality you’ll achieve from this method:
Pros
The clear benefit of this method is that it’s free. Nearly everyone has a cell phone these days – and kids can use their parents’.
The images are usually good enough for children’s school assignments or hobby images for kids.
Cons
While this is a really simple method that works well enough, the images are not of the quality you’d get from either of the other two methods listed below. There is often a color haze around the edges of the circle and there’s a fair amount of fiddling involved to finally get the snap you want.
Method 2: Use a USB Microscope Camera
I used to think this was the best method. You can buy many cameras these days with dedicated USB microscope cameras. These cameras are designed to slip into the ocular tube in place of the eyepiece.
You plug the other end of the microscope into a computer via USB cord. You’ll then be able to see the specimen live on your computer screen.
Of all the options available on the market, my preferred is the Amscope M500 (that said, even the M500 won’t be nearly as good as a DSLR).
While this seems like a great solution, there are some big downsides which I outline in the ‘cons’ section below.
Pros
The quality of the image will be better than an equivalent resolution cell phone. This is because the USB microscope camera is held in place, won’t wobble, and is angled correctly to reduce light diffraction.
But the biggest positive of a USB microscope camera compared to a DSLR camera adapter is that they’re light. You can place a USB microscope camera into the ocular tube of a binocular microscope without upsetting the balance of the microscope too much. This can’t be said for a bulky DSLR camera (if you’ve got a trinocular microscope, this problem is resolved because the DSLR balances on top of the microscope rather than the front.
Cons
The cost of a good USB microscope camera is prohibitive. You can get ones for around $120, but they’ve usually got the resolution of those old pixelated flip phone cameras. To get a camera with good resolution, you’re looking at upwards of $500.
A USB microscope camera is also comparatively more expensive than a DSLR camera. Dollar for dollar, you’re better off buying a DSLR camera and a camera to microscope adapter. You’ll end up with not only a microscope camera, but also a quality everyday workhorse DSLR camera.
And if you already own a DSLR camera, the camera to microscope adapter is usually only about $120.
My other main concern is taking videos is almost impossible unless you have a USB 3.0 compatible microscope camera and computer port. Most microscope cameras will come with only USB 2.0 which acts as a bottleneck for videography. Your frame rate will be seriously bottlenecked and quality will be poor.
Method 3: Use a DSLR Camera with Microscope Adaptor
In my opinion a DSLR camera with a microscope adaptor is the best way to take photos with a microscope and surprisingly affordable.
This is particularly good if you:
- Already have a DSLR camera, and
- Have a Trinocular microscope head
A DSLR to microscope adaptor is a lens piece that can be inserted into your DSLR camera on one end and the microscope’s ocular tube on the other. He’s the setup for my Nikon adaptor:
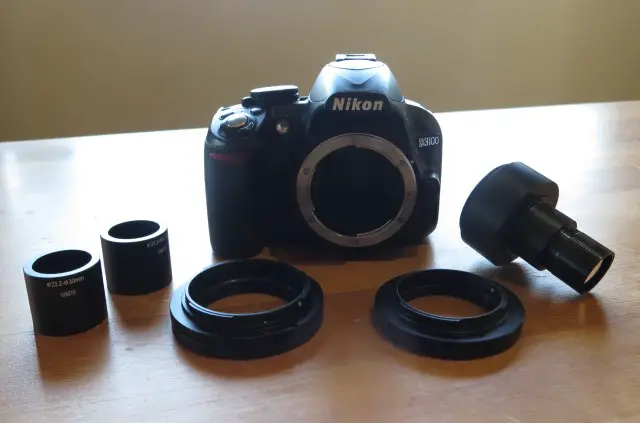
You simply get the camera to microscope adaptor, temporarily replace the lens on your camera with the adaptor lens, and insert it into your microscope. Here’s those steps again:
- Buy either a Nikon or Canon camera-to-microscope adaptor. I use the CA-CAN-NIK-SLR adaptor (get it here), which fits both Canon and Nikon cameras as well as all main ocular tube sizes (23.3mm, 30mm and 30.5mm) so it’s a real catch-all adaptor.
- Remove the DSLR camera’s lens
- Attach the adaptor lens to your camera
- Insert the camera into your microscope’s trinocular tube
While it can be boiled down to those 4 steps, in reality it took me a good 20 minutes to figure out how to get this done, so if you’re a simpleton like me and need a bit more of a walkthrough, see my blog post on “How to attach your DSLR Camera Adaptor to your Microscope”.
Once those steps are complete, your camera and microscope setup should look something like this:

Pros
The quality of DSLR cameras is higher than that of USB microscope cameras.
If you already have a DSLR camera, this is the most affordable high-quality way to take photos. It will set you back somewhere between $100 to $150 and you’ll be getting the resolution (usually around 20MP) of a DSLR camera which is far superior to that of even a high-end microscope camera.
You can take videos without bandwidth limits. The camera will save the data onto its memory drive, which you can move over to your computer afterwards.
I also like the freedom to try out settings on my phone while using the camera, including using the ‘flash’ which can surprisingly do some good to help with contrast at times.
Cons
DSLR cameras are heavy. If your microscope doesn’t have a trinocular port, the camera will put the microscope off balance and you’ll have to hold the camera at all times. This is why I usually recommend a trinocular microscope.
Conclusion
Overall, if you’re just taking simple photos for a child’s activities, the cell phone will do the trick. But if you want decent quality pictures, the best option is a DSLR camera. This is a cost effective solution if you already on a DSLR, because you can just buy an adaptor – simple!

Hi, I’m Chris and I run things around here! I share all my microscopy experiments, microscope information and tricks, how to guides, and microscope reviews in the articles on this site. Browse around to see what you like (I recommend the experiment ideas section) or connect with me on any of the social platforms listed below.