
 About this Article: Hi, I’m Chris – an amateur microscopist. This information is stated as personal opinion for my circumstances and does not constitute advice to you and your circumstances or guarantee quality or fit for purpose of the following products. Use of this website is governed by our Disclaimer, Terms and Conditions and Privacy Policy posted in the footer of this website. As an Amazon associate I earn from qualifying purchases..
The CA-CAN-NIK-SLR is a DSLR camera to microscope adapter by Amscope. It allows you to take DSLR quality photographs through a microscope.
This adapter is in my opinion the best of the DSLR camera to microscope adapters because it’s flexible.
It works with:
- Both Canon and Nikon DSLR Cameras
- All 3 Common Microscope Ocular Tube Lengths: 23.2mm, 30.0mm and 30.5mm
In other worse, it’s a universal (almost) catch-all DSLR camera to microscope adapter.

If you don’t have this adapter yet, you can buy it here.
For the rest of this article, I’ll walk you through how to set up this camera to microscope adapter once it arrives on your doorstep.
CA-CAN-NIK-SLR Camera to Microscope Adapter Set Up Instructions
It was infuriating when I got my CA-CAN-NIK-SLR camera to microscope adapter, only to find I couldn’t attach it to my microscope.
It arrived with no instructions and the expectation that I knew exactly what to do.
And I went to Google to find instructions, as well as the Amscope website, and no information was available.
So I decided to make this little instruction guide.
The Good news is it’s actually pretty easy once you figure it out. And on top of that – I’m happy to report the adapter is working really well and I’m getting great quality pictures of my experiments.
Step 1 – Purchase and Unboxing
To buy the CA-CAN-NIK-SLR, you can get it on Amazon.
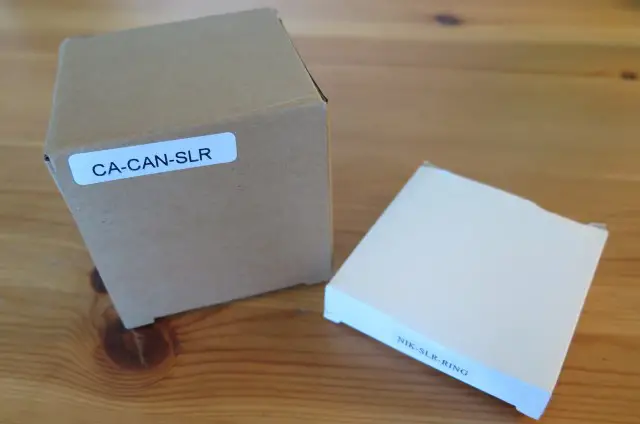
You should get these two boxes in the post. One holds the adapter set up for a Canon microscope, the other with the Nikon adapter:
Once opened, you should have all the parts set out like this:

Step 2: Install the Nikon Adapter (Optional)
This step is only if you have a Nikon camera. If you have a Canon camera, skip to Step 3.
This is the step where I got really stuck. Be aware that the Canon SLR ring is actually in two parts. Remove both the Canon rings so the lens is stripped down to just the nub. I removed only one ring and then tried to attach the Nikon ring on top, and I couldn’t for the life of me figure it out.
Look at the image below for what you need – just the lens nub, and the Nikon T2-AI ring:
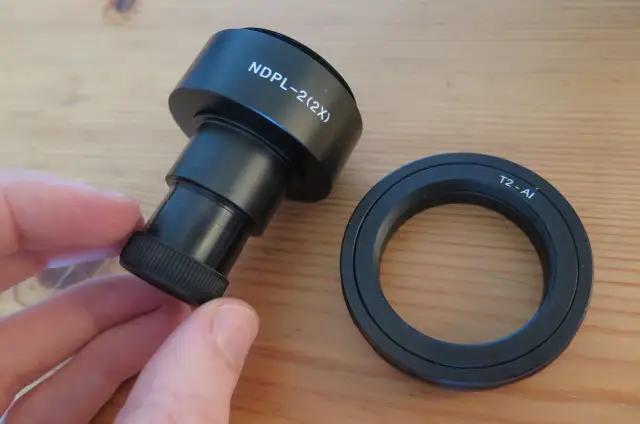
Screw the T2-AI ring onto the NDPL-2(2X) part. The side of the ring that reads “T2-AI” will be facing the NDPL-2 part, so the text will actually end up being covered when you thread the T-Ring onto the lens.
3. Detach your DSLR Lens and Insert your adapter Lens
Get your DSLR camera and detach the DSLR lens. To do this, there should be a release button right beside the lens. It’s shown on my Nikon 3100 below in the red arrow. Hold down that button and rotate the lens to release it.
Once the DSLR lens is released, attach the adapter lens. To insert it, line up the red dot with the white dot, as shown by the red square below:
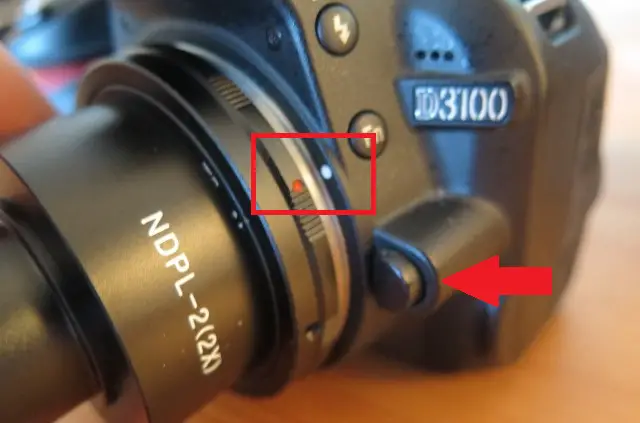
Once the lens is inserted, rotate it anti-clockwise to secure it.
4. Set the Camera to Live View Mode
Your camera may not actually recognize that there is a lens attached to the camera. For my Nikon, I resolved this issue by flicking the switch that is directly below my finger in this image:
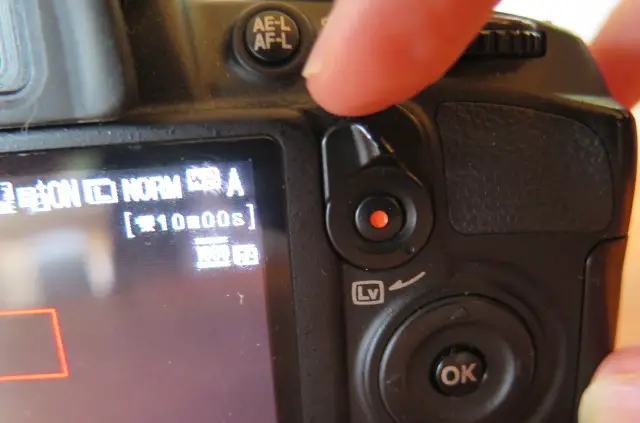
This switch, which is indicated by an [Lv] sign on my camera, stands for ‘Live View’.
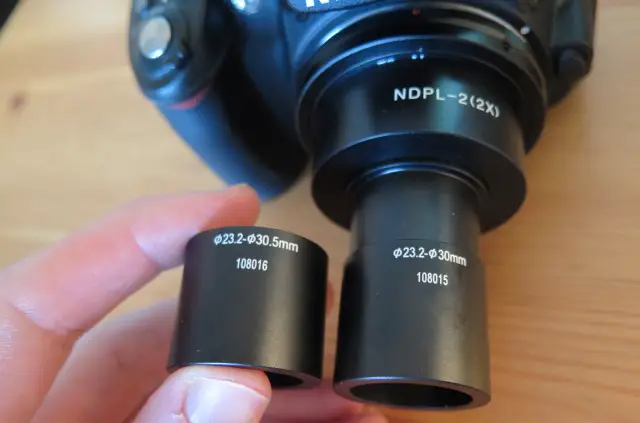
4. Choose your Ocular Tube Size Adapter
The end of the lens adapter (under the cap) is exactly 23.3mm in diameter.
Most compound light microscopes have internal ocular tube diameters of 23.3mm, so you should be able to insert the end right into an ocular tube on your microscope.
But if your microscope’s ocular tube has a different size, there are adapters for that too. This microscope comes with adapters for 30.0mm and 30.5mm ocular tube dimensions. These are the other two most common ocular tube sizes.
Below is an image of the two adapters. The 30.0mm adapter is inserted over the lens:
5. Insert into Ocular Tube and Find your Focus
Now all you need to do is place the camera over the ocular tune, then find focus using the coarse and fine focus knobs on your microscope.
Here’s an image of the camera inserted onto my Amscope T490B:

To achieve focus, you can’t use the camera – you need to use the microscope itself. This is just like you’d do it if you were looking through the eyepiece:
- Set the microscope to the 4x red striped scanning lens
- Set the stage to the lowest possible position
- Use the coarse focus knob to raise the stage until you achieve focus (look at the camera’s LCD screen to see if focus is achieved)
- Move to the low power lens and use the fine focus knob to find focus again
- Repeat step 4, moving up through the objective lenses until you have optimal view of your specimen
Other Ways to Take Photos of your Experiments
In my opinion, a DSLR camera adapter is the best quality solution for taking photographs through a microscope.
The other two solutions (using a cell phone against an eyepiece, and using a dedicated USB microscope camera) are, in my opinion, inferior. The cell phone is a free solution, but produces lower quality images. The USB microscope camera is a more expensive option and tends to deliver lower quality images than a DSLR camera.
Here’s a clear breakdown of your options:
|
Method |
Price |
Quality |
My Favorite |
Downsides |
Best For |
|
1. Cell Phone |
Free |
Low |
The one in your Pocket! |
Poor images |
Kids’ Projects |
|
2. USB Microscope Camera |
High |
Medium |
Poor video |
People without a DSLR camera |
|
|
3. DSLR to Microscope Adaptor |
Medium |
High |
Heavy |
Videos and high quality photos |
If you’d like to learn more about one of those other solutions, check out my article on the three ways to take a photograph through a microscope.
Conclusion
I’ve been really happy with the quality of the photos I achieved with my CA-CAN-NIK-SLR camera to microscope adapter. But, it was a bit of a learning curve to figure out how to set it up. I hope this guide helps you to get set up faster than I did so you can start taking your photos. Once you’re set up, why not share your pictures with other microscopy enthusiasts on online forums such as Amateur Microscopy on Facebook and r/microscopy on Reddit.

Hi, I’m Chris and I run things around here! I share all my microscopy experiments, microscope information and tricks, how to guides, and microscope reviews in the articles on this site. Browse around to see what you like (I recommend the experiment ideas section) or connect with me on any of the social platforms listed below.