
This is a simple setup guide for the Amscope T490B from an owner and user.
It’s not an official Amscope guide, but because there weren’t really any instructions in my box about what to do, I thought I’d put this together on how I did it.
I’d say it took me about 10 minutes to get it all set up, and it was all pretty straightforward. There were one or two things that made me pause for a few moments, but overall it was pretty easy.
And the cool thing is everything you need is in the box. They even include an Allen key!
So let’s get on with the setup procedure from beginning to end!
(This is just my setup procedure, not official advice.)
Amscope T490B Parts (Out of the Box)
Out of the box you should see the components listed below.
My parts below probably look a little more disorganized than yours – I’ve packed and unpacked this microscope multiple times, so a lot of the packaging has been thrown out. But all the parts are still there and I return them to their packaging every time I pack away:
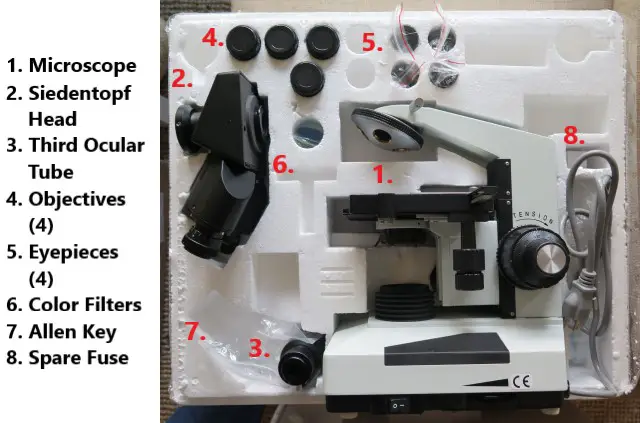
The parts, numbered above, are explained in some more detail below:
- Microscope – The actual body of the microscope is already put together for you. This includes the stage, which when arrived is fully lowered so it fits into its spot within the Styrofoam packaging.
- Siedentopf Head – The head is not placed onto the microscope, you’ll have to do that yourself. I have instructions listed below. The Amscope T490B comes with a really nice Siedentopf head that can also be rotated 360 degrees.
- Third Ocular Tube – The third ocular tube is the one that sticks right out the top of the microscope and allows you to attach a camera. You’ll have to install this yourself as well, after you’ve installed the head.
- Objectives – The Amscope T490B comes with 4 objectives – 4x, 10x, 40xs and 100xs. Each objective is placed in its own storage container, which is a really nice touch. You’ll need to install the objectives yourself.
- Eyepieces – The microscope comes with a set of 10x eyepieces and 20x eyepieces. I only really ever use the 10x ones. You can see in the image above that the eyepieces don’t come in their own containers but do have their own zip lock bags. I always return them to the zip lock bags after use.
- Color Filters – The three color filters (yellow, green and blue) can be placed into the condenser to help neutralize the lighting in certain circumstances. I’m yet to experiment with them.
- Allen Key – It’s really nice that they included an Allen key which will be used to construct your microscope.
- Spare Fuse – The spare fuse can be used if you accidentally blow your first one. To avoid this eventually, always dim the light before switching it on.
How to Set up the Amscope T490B (Visual Instruction Guide)
1. Install the Head
The first step is to attach the microscope head (Part 2 in the diagram above) to the top of the microscope base. The location where it’s attached is indicated in the image below. Note that there is a small screw that you will need to screw right out in order for the head to fit into this section.
Once you’ve unscrewed that screw and placed the base of the head into the hold, re-tighten the screw to secure the head.
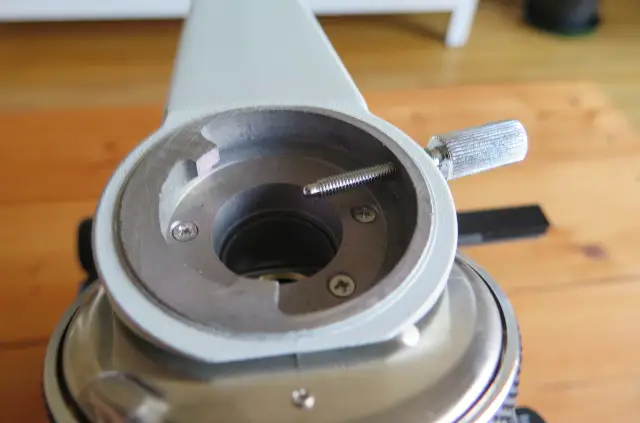
The image below shows how the head should look once it’s in place. In the image, you can see I haven’t actually screwed that screw tight again, so it’ll be loose. Make sure you tighten that screw!
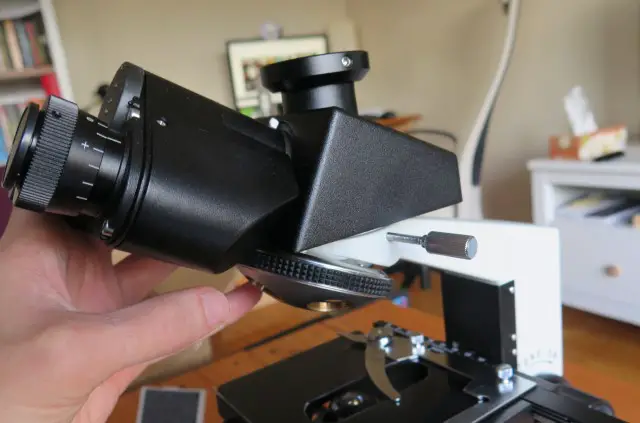
2. Install the Trinocular Piece
The next step is to install the third ocular tube, which is indicated by the number (3) in the image on the top of this page.
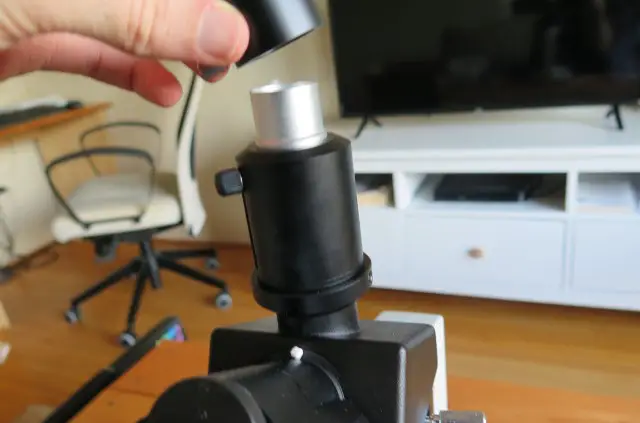
The ocular tube is placed on top of the microscope head. You’ll need to uncap the lid that is on top of the outlet and also unscrew all the small screws around the edges. Use the Allen key for this. You can see me doing this below:
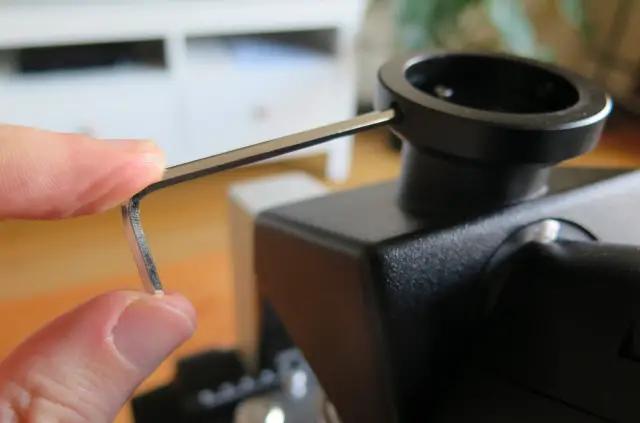
I made sure I didn’t fully unscrew these screws – I simply loosened them enough to place the ocular tube into its mount. If you fully unscrew them, it might be a bit hard to re-thread them.
Once you can fit the ocular into the mount, re-screw all of those screws with the Allen key so it’s secure.
The base of the ocular tube is the black part, and the top will be the silver part (see image below). There’s a lid on that silver section which you can leave in place and simply remove when you want to place your camera into that tube.
3. Install the Objectives
Next, take out all four of the objectives. They look like this below:
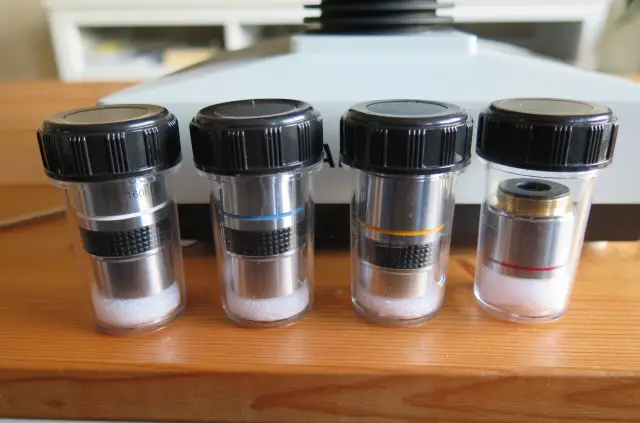
The lenses above are (accidentally) sorted from highest power on the left to lowest power on the right. The white color band is a 100x objective, blue is 40x, yellow is 10x and red is 4x.
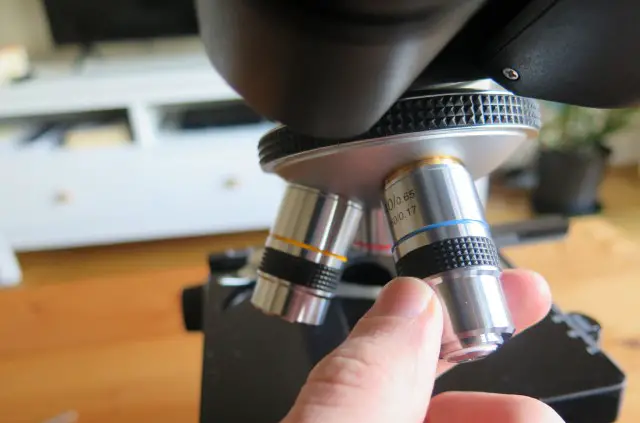
I usually start with the 4x objective and work my way up. Take out the objective and screw it into the objective turret. Once it’s fully secured, rotate the turret and install the next spot. It doesn’t matter which of the four holes you use on the turret as all four of the objectives have the same sized threads. But try to install them in order so you can rotate the turret clockwise to gradually go up in magnification.
Below is a picture of me screwing the blue banded ‘High Power’ objective into the turret:
4. Install the Eyepieces
Last but not least, you’ll need to install the eyepieces. They’re indicated by the number 5 in the image at the top of this article. They are kept in zip lock bags. I recommend keeping those bags because you’ll always want to store one pair while using the other.
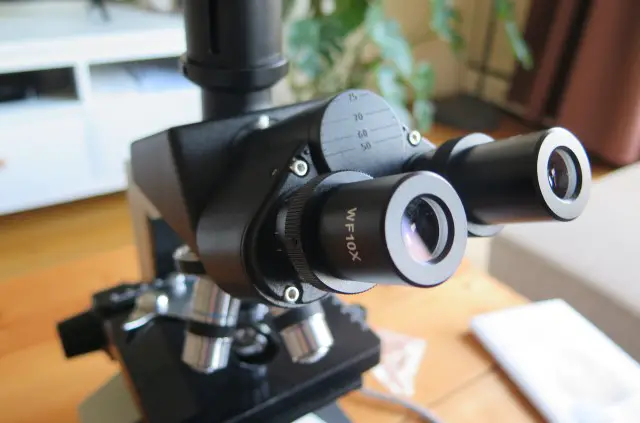
99% of the time I’m using my WF10x pair. The 20x pair aren’t really all that useful to be honest because most things amateurs are looking at will best be viewed with the 10x eyepiece and either the Low Power (yellow 10x) or high power (blue 40x) objectives.
So, I’d recommend installing the WF10x pieces for getting started and you can always step up to the 20x pieces if you feel you need them.
Simply remove the caps on the head, place them somewhere safe, and put the eyepieces into the two ocular tubes. It should look as below when done:
Conclusion
That’s it! You can get started right away now that the microscope is all set up. And if you don’t know how to use your microscope yet, see my guide on how to use a microscope. You can also check out all my project ideas for cool experiments you can do with your microscope.
Lastly, I’d recommend deconstructing the microscope and placing all the parts back into their containers / bags and back into the Styrofoam packaging. Keeping it all in the packaging and box will not only improve the microscope’s lifespan, but also increase the resale value. Unfortunately this microscope doesn’t come with a storage container, so that packaging is important to keep. If you’re going to be using the microscope the next day, you can use the included dust cover for storage.

Hi, I’m Chris and I run things around here! I share all my microscopy experiments, microscope information and tricks, how to guides, and microscope reviews in the articles on this site. Browse around to see what you like (I recommend the experiment ideas section) or connect with me on any of the social platforms listed below.