
A compound microscope is the most common microscope you can get and the type you’ll typically see in a lab or hobbyist’s study. These microscopes tend to have total magnification between 40x – 2000x to allow you to see specimens like bacteria and cells.
 This list of the parts of the microscope can help you to understand how to use your microscope safely and also know what you need to adjust to get the best view of your specimen.
Note that these are parts for a compound microscope. Stereo microscopes work differently and will have different parts altogether. To know if you have a stereo or compound microscope check the magnification – most stereo microscopes only have magnification between 20x and 80x, as opposed to 1000x and up for a compound microscope.
Let’s go!
List of Microscope Parts and their Functions
1. Ocular Tubes (Monocular, Binocular & Trinocular)
The ocular tubes, are to tubes that lead from the head of the microscope out to your eyes. On the end of the ocular tubes are usually interchangeable eyepieces (commonly 10X and 20X) that increase magnification.
There are usually between one and three ocular tubes on a microscope:
- Monocular microscope: one ocular tube
- Binocular microscope: two ocular tubes
- Trinocular microscope: three ocular tubes
A single ‘monocular’ tube is most common on microscopes under about $150. Monocular microscopes have the advantage of being easy to use and share among children and students. This is because there’s no need to change the interpupillary distance on the tubes to adjust for each user.
The best way to use a monocular microscope is to keep both eyes open to reduce eye strain.
But monocular microscopes will nearly always cause eye strain during long hours of observation, so longer observations are usually done best with binocular microscopes.
A binocular microscope is most common for microscopes over $150. They are generally found to be more comfortable because you can look at your specimens with both eyes. On a compound microscope each ocular tube delivers the exact same image to both eyes.
A trinocular microscope has three ocular tubes – two for the eyes (traditional binocular) and one for a camera. Without the third tube, people often have to place a camera over the ocular tube that they would look through, meaning you can either capture the image or manually observe, but not both. The trinocular microscope fixes that problem.
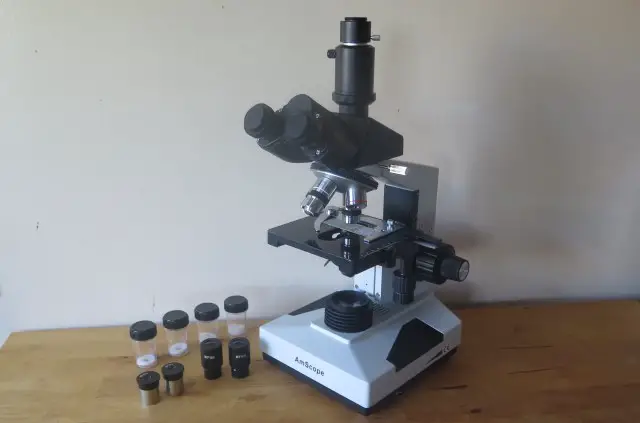
Here’s a photo of my trinocular microscope. Notice the third tube pointing out the top:
> Read more: Monocular vs Binocular Microscopes
2. Eyepieces (aka Ocular Lens)
The eyepiece or ocular lens is the magnifying lens at the end of the ocular tube that you put your eyes up against to view the specimen.
The two most common types of eyepiece are the Ramsden and Huygens, which are built slightly differently, but both effectively magnify the specimen.
You might also see the inscription ‘WF’ or ‘UW’, which mean widefield and ultra-widefield, as indications of the field of view that the lenses provide.
For a compound light microscope, there are usually two sets of ocular lenses in a purchase: 10X and 20X. However, this isn’t always the case, particularly with Barlow lenses which can change magnification without you having to swap to another lens.
You may also find there is a pointer or even an uncalibrated measuring scale on the eyepiece to help you to measure the width of your observations (measuring scale) and ‘point out’ the focus of your observation (pointer).
3. Diopter
The diopter is a fine focus adjustment mechanism found right by the eyepiece. It allows you to adjust the focus for each eyepiece separately.
This is really useful for people who usually wear glasses or have different vision in each eye. In fact, most people do.
So, you can adjust the diopters so the eyepieces have perfect focus for both your eyes, meaning you won’t need to wear glasses while working on the microscope.
Most microscopes have only one diopter on the left eyepiece. For these, focus the microscope using the fine focus knob by the stage so your right eye has perfect vision of the specimen. Then, adjust the left eyepiece diopter until your vision is clear in the left eye also.
I love this simple interactive app that gives you a good clear understanding of how to use a diopter.
4. Head (Siedentopf vs Sliding)
The head of a microscope is the housing that holds the ocular tubes and eyepieces. When you get a compound light microscope out of the box, you’ll often find the head is detached and you need to attach it to the body of the microscope.
Most modern microscopes have a 360 degree rotating head which allows you to spin the eyepieces around when sharing the microscope with a friend.
There are two main types of heads: sliding and Siedentopf.
The key difference between these types of heads is the way in which they adjust the interpulipary distance (how you move the eyepieces closer together or further apart).
A sliding head simply allows you to move the eyepieces closer together and further apart by ‘sliding’ them on a rail. I’ve found this to be most common in many Omax microscopes.
A Siedentopf head is more like a pair of binoculars, where you squeeze the ocular tubes together and they rotate around a central axis, as shown below:
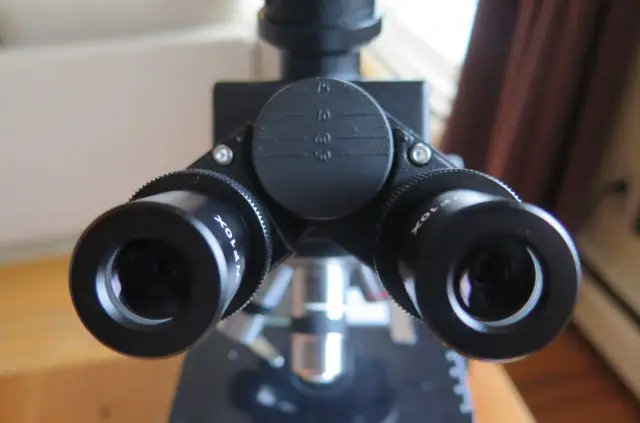
The advantage of a Siedentopf head is that it allows you to adjust the interpupillary distance without losing focus on the specimen.
> Read more about the 3 Types of Microscope Heads
5. Revolving Nosepiece or Objective Turret
This is the part of the microscope that holds the objective lenses. It sits just about the microscope’s stage. You’ll hear it called the nosepiece and objective turret interchangeably. It usually contains between 2 and 4 objective lenses that you can rotate to increase the power of the magnification.
You can get ‘reverse’ nosepieces which rotate the turret inwards, allowing more working space on the stage. Generally, though, this make little difference for the quality of the user experience.
6. Objective Lenses
The objective lenses are mounted on the microscope’s turret. You can rotate between them and each provides a different magnification that the previous. When locked in place, the objective will look directly at the specimen, providing magnification before sending the image up through the ocular tube and into your eyepiece.
Here is a photo of the objectives on my microscope:
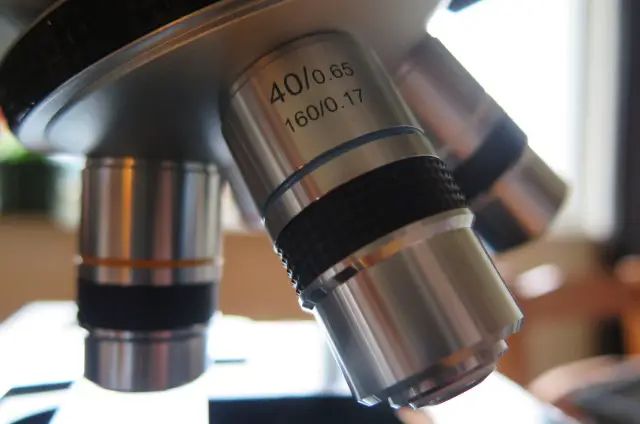
There are usually 4 objective lenses: 4x, 10x, 40x and 100x. However, this does change depending on the make and model of your microscope. These lenses are usually classified and color coded (with a colored strip on the lens housing):
- Scanning Lens: 4x magnification, Red strip
- Low Power Lens: 10x magnification, Yellow strip
- High Power Lens: 40x magnification, Blue strip
- Oil Immersion Lens: 100x magnification, White strip
Combined with a 10x eyepiece, the above objective lens powers will deliver total magnification of 40x, 100x, 400x and 1000x.
In an effort to normalize objective lenses, German authorities developed the DIN standard (abbreviated from “Deutsche Industrial Normen”). DIN standard objectives are interchangeable between microscopes as they all have the same thread properties so they will fit on all DIN normalized objective turrets.
Personally, I only buy microscopes with DIN standard to allow me to buy upgrades and replacements.
You may also notice that on 40x and 100x objectives they will come with the marking: 100xs or 100xr. The ‘s’ and ‘r’ mean either spring-loaded or retractable, but refer to the same thing. These lenses will retract if they accidentally tap against the specimen slide to protect the lenses from damage.
> Read more: Types of Microscope Objective Lenses
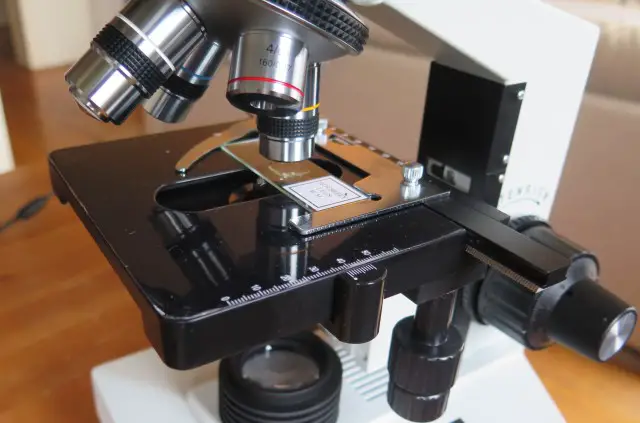
7. Stage (Fixed vs Mechanical)
The microscope stage is where you place the prepared specimen ready to view. It sits below the objective turret and above the lighting mechanism (usually an Abbe condenser). A hole in the middle of the stage allows for light to pass through the stage and into the objective lens.
Usually a stage will have clips to hold the specimen in place.
For fixed stages, the stage is very basic and usually cannot be moved on the X-Y axis. It can only be adjusted vertically to achieve focus. You usually find fixed stages on entry-level models only.
For mechanical stages, you can move the specimen on the X-Y axis using two knobs on the bottom-right of the stage. This can be very useful for higher magnification when you want to scan the specimen to get the focus point right in the middle of your view.
Here is an image of the mechanical stage on my Amscope T490B:
> Read more: What is a mechanical stage?
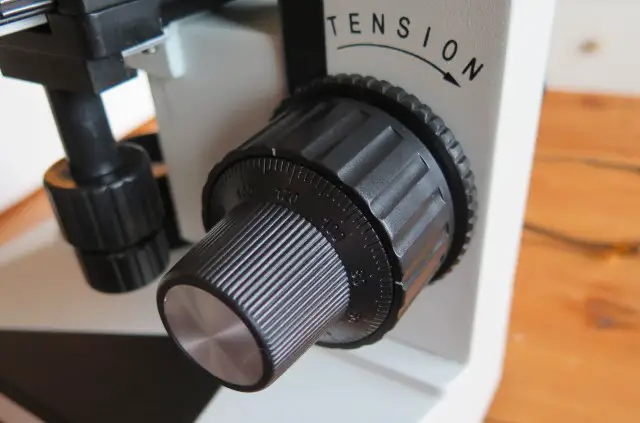
8. Rack Stop
The rack stop is something you’ll likely never need to worry about. This is a knob behind the focus knobs that stops the stage from being raised so high that it will bump against the objective lenses. This is one of the most common ways objective lenses break, so the rack stop is very useful for preventing accidents by beginners and students first learning how to use a microscope. Below is an image of a rack stop switch, which you can see in the bottom left hand corner:
9. Illuminator (Sub-Stage vs Above-Stage)
Compound microscopes tend to have sub-stage lighting only. Above-stage lighting is usually only best for visible specimens (rocks, feathers, etc) that you’d usually look at under a stereo microscope. Sub-stage lights are best for specimens not visible to the naked eye (cells, bacteria, etc) which you usually look at with a compound light microscope.
The illuminator is usually either a halogen or LED light. There are pros and cons of each, but I personally like LED lights because they are not as hot and generally provide a whiter light. Usually you’ll get some yellow, green and blue filters to place in your condenser to normalize the light in case the color of the light doesn’t feel natural.
10. Light Intensity Regulator (Dimmer)
On the bottom right-hand side of the microscope (usually right by the base), you will find a light intensity regulator. You probably know this more colloquially as a dimmer. As you close an iris (or disc diaphragm on cheaper models), sometimes you need to increase light intensity to compensate.
It’s also very important to turn the dimmer to the lowest setting before turning off your microscope’s light, and when you turn it on, allow a few seconds before increasing the light intensity. This puts less load on the light and prevents it from blowing a fuse.
11. Abbe Condenser
The role of the condenser is to manipulate the light source before it hits the specimen. It’s placed between the light source and the specimen, and is usually embedded just under the microscope stage.
The condenser can:
- Distribute the light evenly over the specimen to create a smooth, consistent lighting effect.
- Increase and decrease contrast of the final image, allowing you to create a sharp, clear final image that you would want to achieve for photography.
Most condensers in light microscopes these days are NA 1.25 Abbe condensers. Such condensers allow for oil immersion methods up to about 2500X without too much blur or loss of light. When you move across to darkfield methods, you’ll find you need specialized DF condensers.
The condenser works in conjunction with the diaphragm (discussed below). As you adjust the distance of the condenser from the stage, you’ll often find you need to manipulate the diaphragm accordingly.
The best starting point is to have the condenser close to the stage for maximum light intensity and the diaphragm wide open for a wide aperture. Then, play around to get the best contrast and clarity.
> Read more: What does a Microscope Condenser do?
12. Diaphragm (Disc vs Iris)
The diaphragm controls the amount of light that passes through from the light source to the specimen. It’s usually placed above the condenser but below the specimen.
Once the condenser has modulated the light intensity and distribution, the diaphragm will regulate the width of the cone of light that passes through to hit the specimen.
Most light microscopes will come with either an iris diaphragm or a disc diaphragm.
Disc diaphragms are basic and often used with entry-level microscopes. They have a bunch of set apertures that you rotate between.
Iris diaphragms can be adjusted more finely, allowing you to turn a dial that will increase or decrease the aperture along a spectrum. You will find these on most mid- to high- end light microscopes on the market today.
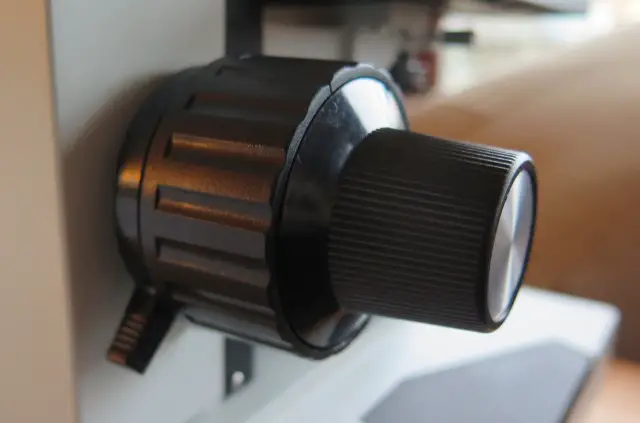
13. Stage Adjustment Knobs (Fine vs Coarse Focus Knobs)
The stage adjustment knobs allow you to raise and lower the stage to achieve focus. Most microscopes have fine and coarse focus knobs, but some cheaper models only have coarse focus.
The coarse focus knob moves the stager much further and faster with less turns than the fine focus knob.
Here you can see the focus knobs on my Amscope T490B:
Generally, you first set the stage height by using the coarse focus knob under the 4x ‘scanning objective lens’ to roughly reach focus. Then, you use the fine focus knob to get a more accurate focus.
Only once focus is achieved with 4x magnification do you move to the higher magnifications (10x, 40x and 100x usually). Under these higher magnifications, only use the fine focus knob or else you may cause damage to the objectives.
You will find the fine and coarse focus knobs on the right-hand side of the microscope arm. They are usually stacked upon one another. You might also find it on both sides of the microscope arm on some models.
> Read more: What does the Stage Adjustment Knob Do?
14. Arm and Base
The arm and base of the microscope are quite self-explanatory. The base is the bottom of the microscope, where you find the light intensity regulator. The arm rises from the base and holds the head of the microscope above the stage.
Make sure to hold the arm and base in each hand when carrying the microscope to and from its storage.
Conclusion
It’s important to know what the parts of the microscope do before operating your microscope. The first lesson in a microscopy classroom walks students through how to use a microscope – from how to carry it (two handed, please!) through to when to use the fine vs. coarse focus knobs on the stage.
Understanding the parts and function of a microscope isn’t just academic. It helps you to operate the microscope safely, as well as allowing you to know how to adjust the microscope appropriately to get the best user experience and, ultimately, the best view of what you’re investigating.
Good luck with your microscopy!

Hi, I’m Chris and I run things around here! I share all my microscopy experiments, microscope information and tricks, how to guides, and microscope reviews in the articles on this site. Browse around to see what you like (I recommend the experiment ideas section) or connect with me on any of the social platforms listed below.